Beat the Chain Pain
Wringing full value out of chains is often no more difficult than knowing how to care for them and when. When finesse is not enough, the situation may require moving up to a more suitable chain. Here are some chain tips that you can take to the...
February 1, 2014 | By By Carroll McCormick
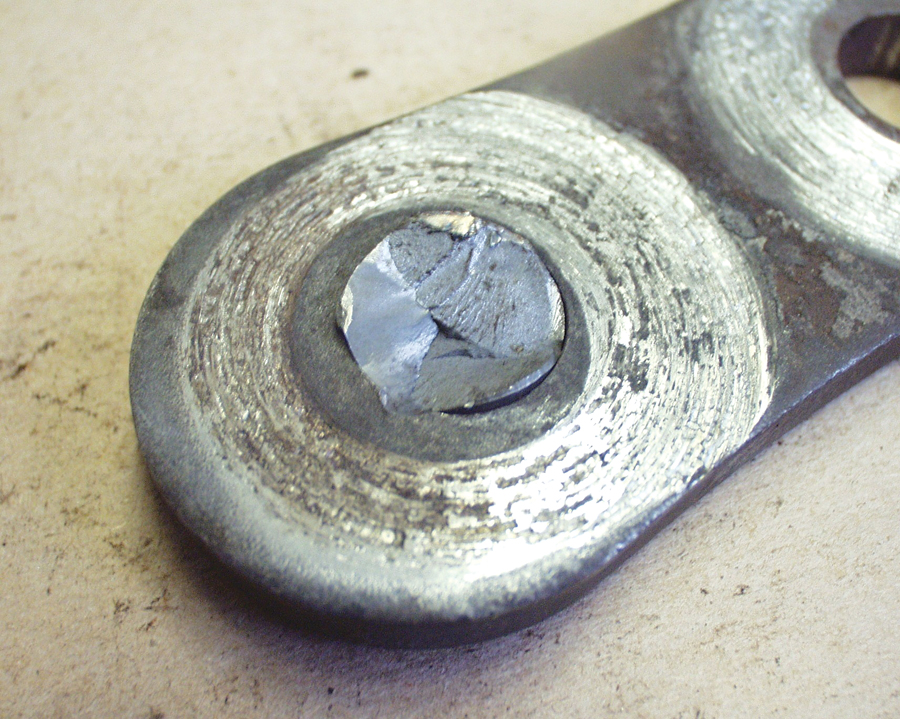
 Misaligned sprockets can cause chain failures. Photo: Tsubaki of Canada
Misaligned sprockets can cause chain failures. Photo: Tsubaki of Canada
Wringing full value out of chains is often no more difficult than knowing how to care for them and when. When finesse is not enough, the situation may require moving up to a more suitable chain. Here are some chain tips that you can take to the bank.
Tip 1}
Check chain direction. Chains with straight sidebars can be run in either direction. Chains with offset sidebars and no rollers, on the other hand, must be operated with the wide end forward to maximize the wear life of the chain and sprocket system. But commonly, says Bob Ramsden, national sales manager, Rexnord, “Most people want to run chain like an arrowhead. I’ve gone to sites where guys say, ‘I’m wearing out chains really quickly.’ We tell them to reverse the chain and run it wide end forward. The resulting wear life increase can be significant.”
The exception to this rule is when the sprocket centres are roughly five feet or less apart, in which case it is better to run chains having offset sidebars with the narrow end forward.
Tip 2}
Stop wrecking press-fit pins. Conveyor, elevator, drive and roller chains generally are manufactured with press-fit pins. Because the pins do not turn in the sidebars, the chains are better able to withstand loading and unloading shocks and last longer.
The problems begin when mechanics repair or assemble chain without chain presses. They will frequently grind out the hole in the sidebar or grind down the diameter of the end of a pin for an easier fit. But now the pin turns in the sidebar. This is a very bad thing. How bad? If a chain has a normal life of 15,000 hours, a chain with a loose pin can halve its life, or worse, the chain will break at this loose connection point.
“If there is clearance between the pin and the sidebar hole, the pin will move [within] that hole as it goes over the sprocket. It will open up the hole and eventually pop out. It is very important that the pin does not move in the sidebar,” Rexnord’s Ramsden says.
Tip 3}
Set proper chain sag. Chain that is too tight causes rapid wear of all the system components. Chain that is too loose causes noise, shock loading and chain wear. According to Ramsden, the right amount of chain sag for smooth drives is that it be 2% of the distance between the sprocket centres. If two sprocket centres are 100 in. apart, for instance, just divide by 50. The sag should be 2 in. For shock drives, the sag should be half that.
Note, however, that it is the sag, not the total up and down slack in the chain. Make the measurement halfway between the sprocket centres in the unloaded section of the chain. First, though, give the chain a yank to remove any slack in the loaded section of the chain, advises Ramsden.
Tip 4}
Understand chain replacement time. It is apparently a bit of a mystery when chains should be replaced. “Ask some people this question and they reply, ‘When the chain jumps sprocket teeth or when the chain breaks’,” says Richard Neuhengen, product manager, chain, for Timken Drives LLC. There is a better way.
Chain can be defined as worn out when it has elongated 3%. If, however, the system has any sprocket with more than 67 teeth, the maximum acceptable elongation will be 200/N, where N is the number of teeth on the largest sprocket. If, then, you have a 100-tooth sprocket, the acceptable elongation is 200/100 = 2, for a 2% maximum elongation before the chain should be replaced.
A simple way to check for wear is to use a chain gauge, which measures the space between two roller links. Timken Canada, among others, sells standard wear gauges, but can also make custom versions. One Timken customer, for example, ordered a custom wear gauge that shows 2.5% elongation. “When the chains reach 2.5% elongation, the maintenance people order new chains. Then they are waiting on his [stockroom] shelf [for] when the old chain hits 3% elongation,” Neuhengen says.
Tip 5}
When to replace worn sprockets. Rules of thumb and measurements are useful guides for when to replace sprockets. One such rule of thumb suggests replacing the sprockets every three times the chain is replaced. More precisely, a sprocket should get the heave-ho once chains have worn away 10% of the tooth width, looking at the sprocket face-on.
To know where to check for this 10% loss, you need to calculate PCD, which is the pitch circle diameter: measure Y, which is the width of the tooth where the PCD line crosses the tooth, and then measure whether X, the chain wear depth on the tooth, is 10% or more of Y. (You can find explicit details on the Internet.)
A quick eyeball inspection can also reveal excessive wear. “If a hook forms on the tooth of the sprocket, or if it looks worn, it should be replaced,” Neuhengen says. Worn sprockets cause high loads on chains, reducing their wear life or in some cases causing chain breakage.
Ponder these numbers from Timken: A new chain and new sprocket results in a shared load on several teeth: 1st tooth, 31%; 2nd tooth, 21%; 3rd tooth, 16%; 4th tooth, 12%; 5th tooth, 8%. But with a new chain and a worn sprocket, the first tooth takes 100% of the load. Ouch! By the way, it is also a bad idea to run a worn chain on new sprockets.
Tip 6}
No lubrication vacation! Properly lubricated chains can last 100 times longer than poorly lubricated chains. The lubrication method depends on chain speed and the amount of horsepower being transmitted. The bottom line, though, is that to achieve maximum wear life, lubrication must be able to flow freely into the joints.
Using 90-weight motor oil in an oil bath in an outside application in a North Dakota February (true story, says Richard Neuhengen) ‘don’t butter no turnips’. Low temperature plus high viscosity equals no lubrication. Functioning auto-lubers are pretty handy, so examine those while you are crawling around checking things.
Lubrication methods vary, but here is a thumbnail primer for lubricating chain manually: “The best way to lubricate your chain is to put oil on with a stiff paintbrush. The bristles will remove contaminates from between the link chains,” Neuhengen suggests.
Lubricate the inside of the chain so centrifugal force drives the lube into the chain. Where proper lubrication is not possible or desirable, Neuhengen suggests buying chain with chrome-hardened pins or lubrication-impregnated bushings.
Tip 7}
Do not be a tossaholic. Perfectly good chains often come to an undignified end in the trash. “I always run into situations where customers throw out good chains too quickly,” says Tim Morrison, manager, technical sales and support, Tsubaki of Canada.
Some PM procedures blindly require that chains be replaced at fixed intervals. “I’ve seen chain thrown out at 0.1% stretch because it was written into the PM practice to replace the chain at fixed intervals,” Morrison says. Yet some PM schedules were written for earlier generations of chain that wore out more quickly than today’s chains. Consider challenging your PM schedule.
Chains tend to wear evenly along their length, assuming there is no nasty shock loading or bad repairs. Therefore, relying on chain stretch as a guide for chain replacement is a safe practice. “A lot of companies check chain stretch, but an equal number do not. We spend a fair bit of time on this with customers – checking chain stretch before throwing it out,” Morrison says.
Tip 8}
Cure corrosion confusion. Corrosion is one of the three major chain failure modes (the others are stretch and sudden failure). “Corrosion leads to quick stretching, earlier fatigue and it is messy. Pitting corrosion can go deeper than the case hardening and lead to rapid chain failure,” says Tsubaki’s Morrison.
Corrosion is reduced with proper lubrication, but that does not include grease. A good slobbering certainly coats, but it penetrates poorly. Under that grease-fest, corrosion may be eating your bushings and pins.
What about stainless steel chains? “When people see corrosion, they automatically want to use stainless steel. But the strength of stainless is only 10% that of carbon steel. This surprises people,” Morrison says. Consider zinc- or nickel-plated chain, but understand that plated chain is water- but not chemical-resistant. For this, higher-performing coatings, such as multiple layers of corrosion protection forged into the metal, are recommended.
Tip 9}
Check sprocket alignment. Proper sprocket alignment is critical. Chains are not designed to handle load perpendicular to their pitch line. Like belt pulleys, the shafts on which the sprockets turn may be out of alignment, a bad bushing may tilt a sprocket, or two sprockets may not be on the same centreline.
“In my mind, it is very common to have misaligned sprockets, either they are not installed properly in the first place, or they are allowed to go out of alignment,” Morrison says. The Internet is awash in videos on how to align chains and sprockets if you need specific advice.
Tip 10}
Consider switching to abrasion-resistant chain. Thanks to an abrasive mix of sugar and water, a cookie producer was chewing through C$30,000 worth of chain every six months. The resulting day of lost production and the wages for four men to replace the chain was extra.
“Renold has an exclusive, proprietary abrasion-resistant chain that house-brick manufacturers use. We suggested it to the cookie producer. The solution cost $50,000 but the abrasion-resistant chain has already lasted longer than the 12-months under our warranty. Our objective is for it to last at least two years,” says Patrick Gregoire, regional manager, Renold Canada.
Carroll McCormick is MRO Magazine’s senior contributing editor. He is based in Montreal.
